daveg travels Rotating Header Image

The Road to Corona, California

I had 3 days to make it to Corona, California where I am going to meet up with Race Tech and utilize their suspension expertise on my over weighted DRZ.

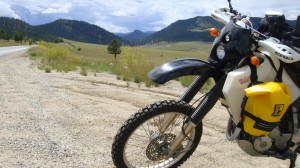
Countless stunning views

My general plan now is to get up around 8 and eat a light breakfast.  Then ride until 1 or 2 pm and eat a noodly and cheap breakfast.  I’ll try to stop around 4 but usually end up riding until 6 or 7 because there are no towns around.

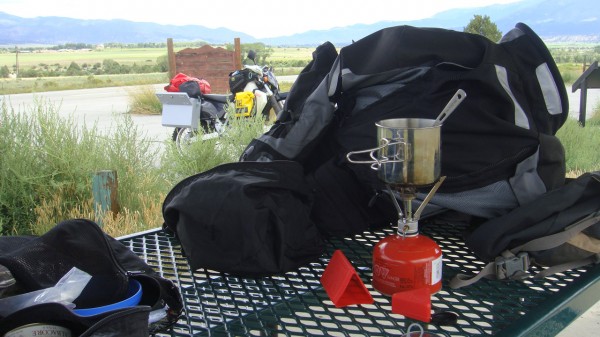
Lunch on the road

Heating up Ramen is the easiest way to make lunch on the road.  I carry 2-3 liters of water in my camelback backpack.  From there I’ll dump a little water into the pot and start boiling.  If I’m particularly hungry, I’ll toss in a can of tuna.  It isn’t the best lunch, but it is quite filling and is the best way to stay on a budget in the USA where meals range from 5-12$ for lunch and 10-15$ for dinner.  I’m trying to spend less than $75 a day when using a hotel and <$50 when camping.

Other than motorcycling and other hobbies that end in ‘ing, one of my favorite hobbies is photography.  It is an art and skill that I’m far from understanding.  I did some experiments with HDR photography.  HDR stands for High Dynamic Range as opposed to normal dynamic range like in your camera.  What is meant by this is that the range and depth of colors that a camera lense can see at a single exposure is much less than what the human eye can perceive.  To get a higher dynamic range, multiple images at different exposure settings are shot then combined in software (in my case, Photoshop).   I’m not going for the crazy ultra-vivid stuff like you often see other places.

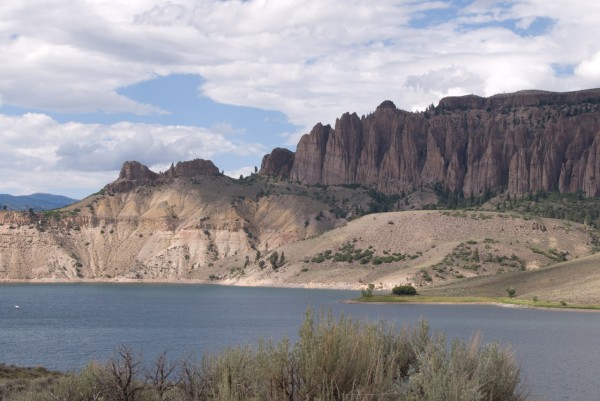
Here is the standard shot.  Notice how you lose detail in the shadows of the rocks and clouds as well as detail in the lighter rocks to the left of the shot.

Blue Mesa Reservoir Standard Shot

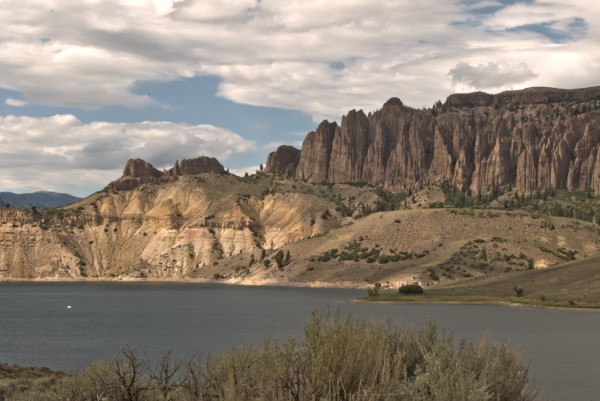
Now there are tons of detail in the shadows and much more color in the light rock.  I shot something like 6 frames at the same F stop but different shutter speeds while the camera was placed on a picnic table.  What do you think?

Blue Mesa Reservoir HDR

Back to the ride.

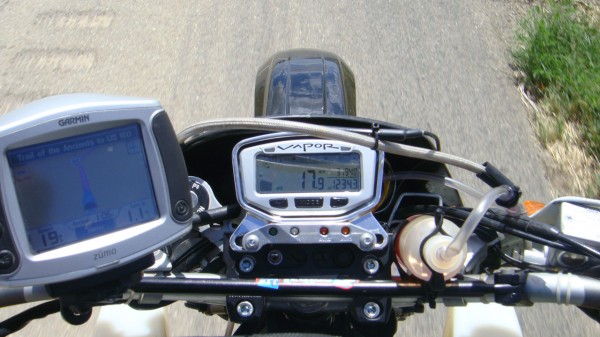
My friend Gary keeps wondering what I did to my DRZ dash setup. The coolest thing I have up there is the Vapor by Trail Tech.  Other things you’ll notice are my Garmin Zumo 550, Highway Dirt Bikes made the LED dash as well as the new top clamp with holes milled out for switches.  The two switches that didn’t come out in the light control my heated grips and a toggle for the headlight.  The last thing is the squeeze bottle Loobman which is a bit of a hack of a chain oiler when compared to my past Pro Oiler as most of the construction consists of zipties.

What I see all day

After leaving Colorado, the environment went desert quickly.  I stayed one night in Flagstaff only seeing my hotel room at night but even worse… I had to pass up the Grand Canyon.  I’ve still never seen it!

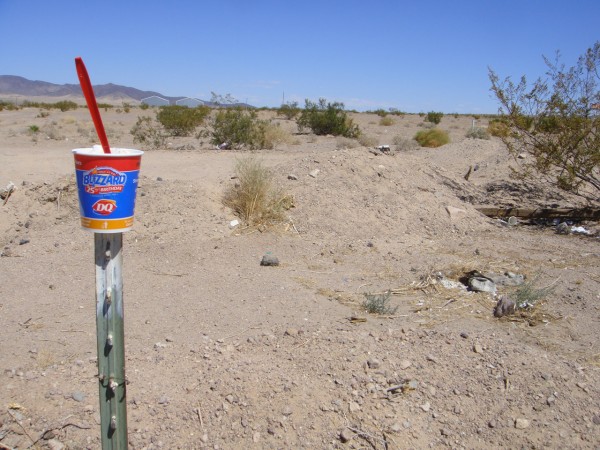
Dessert in the Desert. The best blizzard in the history of DQ

Dessert in the Desert. The best blizzard in the history of DQ

It was the high 110s and really quite miserable.  The best part was my Blizzard at a DQ oasis.

The bike was running great in the heat with the coolant temperature hanging out in the 150s.  The day was starting to wrap up and I was back in civilization on I-15 heading south.  About 30 miles away from Corona I was riding through a pass as the electrical system just completely cut out.  The headlight was dead.  The bike was dead and apparently not sparking.  Blown fuse!

A road-side repair seemed like it would be easy enough since I just blew a fuse, but I was concerned that the fuse would blow again immediately after replacing.  The day was starting to taper and I was pulled over on a major interstate with continuous traffic.  I broke out the cell phone and called AAA.  Yeah, I know.. not the most adventurous thing to do, but hell, I’m in the U. S. of A.  That’s how we do it here.  We’re all about convenience!  Plus, I knew that they’d tow me for 100 miles as included in my package.  I called my friend www.kevinludlow.com and he found me a hotel in Corona as the tow truck showed up in less than 25 minutes.  Did I mention how much I love convenience?

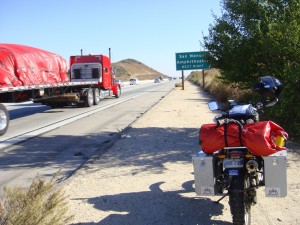
If bike breaks down... always pull way off the road, even if you think it is minor

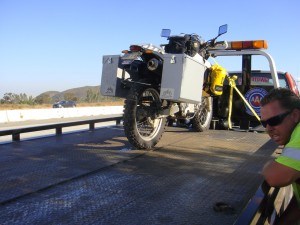
AAA saves a roadside tear-down

AAA saves a roadside tear-down

The funniest was that the fastest  I went all day (and in fact.. the entire trip so far) was while the bike and I were up on the tow truck.

The fastest I've been all day

I got to the hotel and pulled the panels and got to the blown fuse.  I replaced it then checked all over the bike for loose connections and burnt out wires but didn’t find anything.  I fired the bike up and it ran great during the 5 minute test ride around the hotel hopping over curbs and speedbumps.  My confidence in the bike isn’t very solid right now.  The electrical issue is probably related to all my modifications, but I thought I was quite diligent in soldering, heatshrinking, and taping all connections.  Who knows.  I hate it when something is “fixed” without identifying the problem.  That’s twice now.  Tomorrow I visit Race Tech!

Debugging a DRZ that refuses to start

I don’t believe that I’ve had mechanical problems the first week of the trip.  Though that is why I’m doing this long USA portion– to prove the bike.

The fun starts here:

  • Checked to make sure FINEC (you took the MSF class, right?) was all good — Fuel, Ignition, Neutral, Engine, Choke

No luck.

  • Drained the carb to make sure float valve wasn’t stuck
  • Sprayed the carb with carb cleaner

Nothing..but I did manage to crank the battery into submission.  We then tried to push start it a couple of times with equal success.

  • Pull tank and pull the plug and inspect

It looked great

  • Check for spark by grounding the plug on the engine head and looking for a bring blue spark

Tons of spark@#$%@#$%  ARghhh.. At this point I’m very frustrated so…

  • Connect battery to charger and eat an excellent lunch of chicken burritos and green chili sauce
  • Drink beer
  • Learn to like ultrahoppy beer

Then comes the strangest thing.  I talked to my friend Gary back in Austin who is my greatest motorcycle resource and he suggested that I pull the plug and check to make sure it is moist with fuel.  So I reconnected the tank and fuel line and hit the starter very briefly and the bike fired right up.  #$%@#$%  I just tapped the starter and it took off!

I have no idea what was the problem.  Maybe something was some impedance in the fuel system.  Who knows.  I reconnected everything, fought with the seat for 30 mins to get the bike together… and celebrated by going to the Avery Brewery where my riding buddy Chuck’s son works.

Mike, Geri, and I at the Avery Brewery

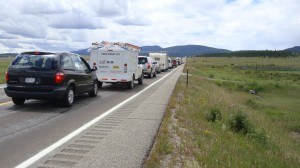
The next morning I get an early start and start to learn about the joys of summer construction in snowy areas.  I have to make it to LA in 3 days.

Summer construction season in the mountains

Finally on the road! Kansas and Colorado

After months of trip preparation and planning, I take off!

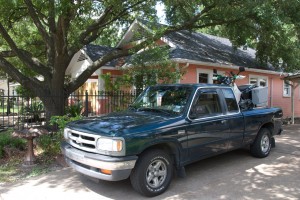
Finally Leaving Houston

No doubt you notice in that picture that the DRZ is in the back of a lovely Mazda pickup truck. That’s my truck.  I paid $2100 for her and can’t give her up. So drove to Kansas City and dropped the Mazda at my parents’ house with the new vehicle ready to depart, if you as me want to travel with the family, buy a Motorhome.

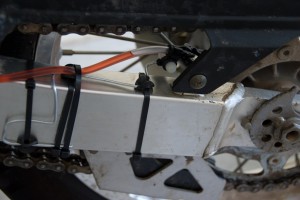
In Kansas, I do my final bike preparation and install a Loobman chain oiler. This was an odd installation as I’ve never used so many zip-ties. Everything was not only attached with them but also BUILT from zipties. The Loobman chain oiler isn’t the highest quality product when compared other oilers out there like the pro-oiler but the price was right.

Loobman Chain oiler. Look at all those zipties!

So.. again…

FINALLY I DEPART VIA MOTORCYCLE

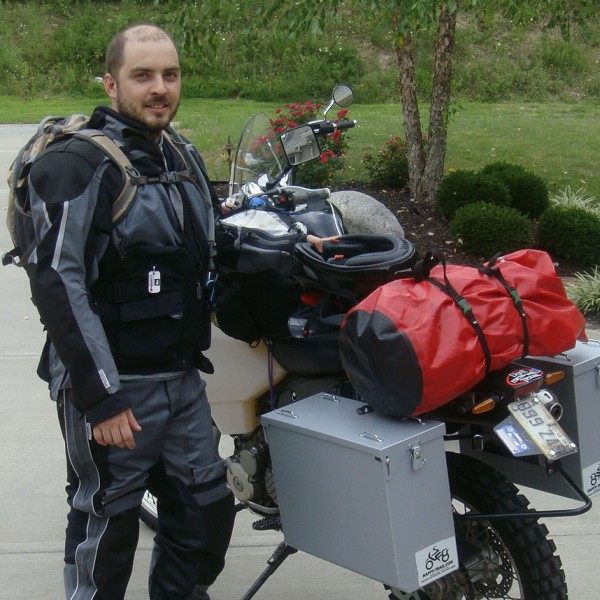
All loaded up and ready. The Suzuki DRZ 400 RTW Edition

Ready to Ride

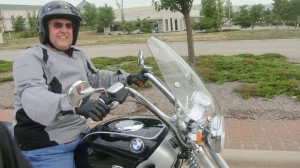
Ready to go:  I’m about a week behind schedule but I finally hit the road.  My Dad who also rides, rode with my first official miles out of town on my RTW trip.  It was a very special moment and I’m happy to have my Dad share it with me.

My Dad rides his BMW R1200 C with me for the first miles of my trip

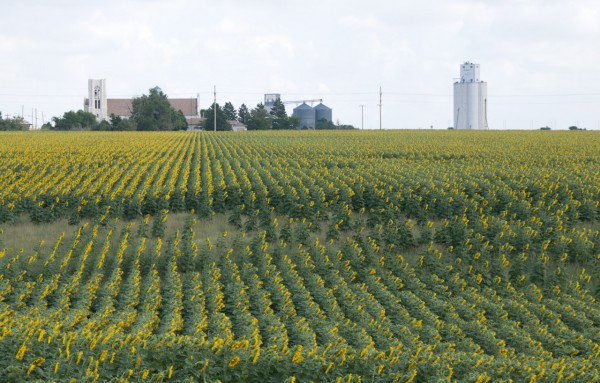
The first day was just miles and miles of agriculture.  I played the game of “name that product” which alternated between soy, corn, and sunflowers.

Kansas – The sunflower state

One of the things mentioned by a few people and suspected by myself was how much fuel was actually usable on the Aqualine Safari tank.  I figured that the ideal time would be to test it in Kansas where there was plenty of fuel and traffic just in case I had problems.  My plan was to ride the bike until I hit reserve.  Like my friend Julio in Guatemala says, “If you want to make god laugh, makes plans”.

I was riding along the interstate and the moto starts to sputter.  No problem.  Flip the switch to reserve.

As I start to slow down rapidly, I switch the petcock to reserve:  problem– the bike doesn’t fire back up.  I’m now coasting to a stop on the side of a busy interstate on reserve but I can’t seem to get any fuel.  Oh crap.  I’m not even a day away and I’m going to have to hitchhike to buy fuel or call AAA.  Great.

I look at the GIANT tank and there is still a good volume of precious gasoline in the tank.  The problem is that much of the fuel is on the side of the tank opposite the petcock and that the petcock side of the tank is below the carb, so gravity is unable to feed it.

Feeling like an idiot reflecting on the that that I have a fuel can only 100 miles away in KC I try to get the gas from the “other” side of the tank to the petcock side.  I put the sidestand down and l e a n  the bike over way to the side to transfer gas to the petcock side raising the fuel level higher than the carbs.

I press the GO button and she fires right up!  Alright… So I quickly check the GPS for fuel and find that the nearest known fuel is 3 miles behind me and the next exit to do a U-turn is another 7 miles away.  For your typical touring bike this would be a problem, but I’m on a DRZ.  I wait for traffic to die down and cut across the highway and dip down in the muddy/grassy space between the highways and emerge onto the returning side of the interstate.

Cruising at 45 mph to conserve the remaining accessible fuel I drive in the shoulder for the 3 miles to exit GPS says has fuel.

Sputtersputtersputter… I run out of gas comically at the off-ramp with the fuel station in sight at the bottom of the hill (!)

Instantly as the sputtering begins I pop her into neutral and coast through a stop sign up a little hill into the gas station gently rolling to a stop in front of the pump.

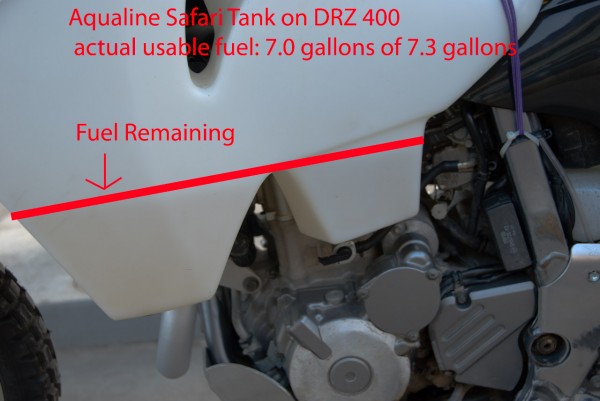
Here’s the useful pic for other Safari tank users:

Fuel usable in the Aqualine Safari tank for the DRZ.  There is no reserve.

A day later I arrive in the Denver area and stay at my brother’s brother in-law’s house.  There has to be a short way of saying brother’s brother in-law, but I’m not sure exactly sure what it would be.  Dave (the BBIL) and Claire (the BSIL) were great hosts and I really enjoyed visiting them.  They’re both pursuing a career in medicine.  Dave has a few years left as Mr. but Clair is already Dr. so it is a Mr. and Dr. In-Law.

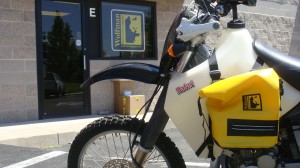
I took the day to try to address my missing tankbag strap issue.  I found that Wolfman luggage was sold all over Denver, but then I realized that Wolfman Luggage is BASED in Denver.

I visited Wolfman Luggage in the Denver area

They were very helpful and gave me the straps I needed and gave me a good deal on tank panniers.

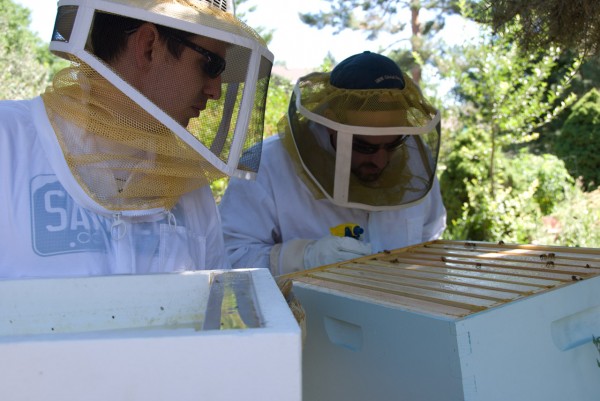
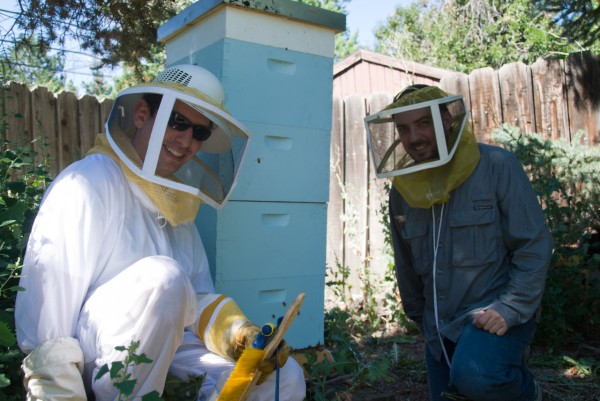
The next AM, my brother, his wife, and their daughter arrived in Denver.  It was great to see them again and Dave showed us his bees.  My brother and I joked about becoming beekeepers ever since we saw Rushmore.  Since then I’ve taken an apiary class but didn’t have the space to set up a hive.

Bees! Dave and my brother check out the bees.

One happy beekeeper and another happy beekeeper wannabee

Happy bees

Bees everywhere! But they are friendly bees

After spending some time with the family, I left Highland Ranch (south Denver) and drove up to meet Bouldergeek from advrider.  I talked to him several times over the years about traveling south and followed his ride report.  While interesting in many ways, he lived near the South Pole for a year where he met his fantastic girlfriend Jeri (who also worked in Iraq!!).  They both showed me an excellent time around Boulder.

Bouldergeek and his KLR that made it to Panama and back

As I prepared to leave Sunday AM for the road… the bike wouldn’t start.  I’m only a couple of days traveling and I’m already having mechanical problems….

We removed the tank so we could check the plugs for spark

Packing Checklist for a Long Distance Motorcycle Trip (Australia & USA)

On my trip to TDF, I spent weeks researching what to bring.   This time it only took me about an hour to get everything together.  The only way you know what to bring and what you will actually use is to have made a big trip yourself.  If you haven’t done that, check out my list and see what I brought .

One thing that you’ll notice is that I did not bring much cold weather gear.  When you have a trip with plenty of time, it is best to buy things along the road as you need them.  Right now as I leave Houston, it is nearly 100F with 90% humidity and will stay quite warm for the entirety of the USA portion of my trip.  Not until I reach Asia is it going to become cold.  This is a stark contract to my TDF trip where I packed for it as if I were planning a completely self-sufficient voyage to Mars.  If you have the time you can bring less, plus it forces you to interact more with the locals.

Personal Maintenance

  • artificial tears — lots of dry eyes from riding day upon day
  • chapstick – same
  • sawed off toothbush – keep those teeth clean
  • toothpaste — better than using soap, which will also work
  • Wahl AA beard trimmer with attachments — try not to look too homeless

Clothing

  • Exofficio grey riding shirt — dries fast and very cool
  • Smartwool Marino wool riding shirt — my first attempt at marino wool, it is supposed to be as cool and dry nearly as fast as synthetic but without the smell
  • Exofficio light long sleeved collared shirt — for very warm and sunny weather as well as cold
  • Exofficio nice green shirt collared — yet another attempt to not look homeless
  • army surpluss black shorts – if it’ll make it through a war, it’ll make it through my moto trip
  • jeans – I’m tired of being synthetic everything.  Jeans are to feel more normal (and less homeless)
  • 3x Exofficio synthetic underwear — dries fast and very cool
  • Running/swimming shorts — less homeless looking than swimming in underwear
  • microfiber camping towel (L) — used all the time for conventional uses to pillow stuffing
  • 4x Wright Sock — dual layered sock, impossible to get blisters

Camping

  • cooking pot with pan lid — Nice container and big enough to cook a meal for a couple of people
  • msr fuel bottle — propane to fuel stove
  • msr camping stove — takes up almost no space and boils well, simmers sorta ok
  • 6 pack seasoning (papriki, salt, pepper, basil, oregano, ojo de pajaro (hothothot pepper)
  • camping TP — you never know if it is going to be where you need to go
  • garbage bag — multitasker from keeping stuff dry or hidden to even used as for garbage vessel
  • tent light — small LED light that hangs from tent.  very nice for when you have to spend more than five minutes in your tent
  • REI spork — it is a spoon.  it is a fork.  It is made of titanium and I wouldn’t have it except I found it at a campsite.  I dont know what I did without it. oh yeah, I carried a spoon and a fork.
  • peruvian winter hat — you’ll never guess where I got it
  • .5 L extra virgin olive oil — my favorite fat to use in cooking
  • foldable plate/bowl/cutting board — it folds flat so why not bring it?
  • sea to summit bowl/plate/cutting board, rigid – excellent multitasker!
  • pot scraper — camp cleaning is nearly impossible, hope this helps
  • pot grabber — or use motorcycle gloves
  • REI Quarterdome T1 1 person tent — it is a little small but packs down so small

Rain Gear

  • aerostitch 3 finger rain gloves with wiper — who needs all 5 fingers in the rain.  these work great
  • nelson rigg boot covers — my “waterproof” gortex lined leather SIDI Typhoon boots are just water resistant
  • very small umbrella — once I’m off the bike, I’m done being wet.  singing optional

Emergency Gear

  • emergency blanket — life safer for the unplanned stopover.  packs tiny
  • compass — if all my other GPSs fail, I still have a compass
  • lighter — so many fun uses
  • 2 caribiners — not really for emergency, but good for hanging light stuff off of other stuff
  • sewing kit — I like to make sock puppets
  • loaded first aid kit — ready for anything.  The key is that I know how to use everything that is inside
  • allergy pills — I’m sometimes allergic to the outside
  • malarone — for S.E. Asia.  Anti-malaria drugs
  • ibuprofen — soreness
  • metronidazole — antibiotic
  • emergency blanket — Yeah, I know I already have this listed, but I have another

Sleeping

  • sleeping bag liner — this is a sheet bag.  I use it way more than the sleeping bag.  Especially inside or for warm weather camping
  • REI nooksack 35 degree sleeping bag — Warm enough to sleep in most weather
  • emergency foil blanket — the 3rd and final emergency blanket.  This one I use when it is too cold for my nooksack.  It’ll keep me nice and warm well below freezing.  kinda annoying because it makes sleeping so crunchy

Electronics

  • Garmin Zumo 550 — I used this GPS for my TDF trip, it worked well.
  • Spare ER-6i — best ear buds ever.  mandatory equipment, so I have two
  • ER-6i accessories — the ear bugs plug up quite often, so I bring tons of spare ear wax filters
  • digi cam charger — charge up that cam
  • laptop lock — we’ll see if I use it, this is the first time that I’ve brought one
  • led keychain lights — giveaways for people who help me out
  • memory card reader — yup
  • Gameboy DS — for the long boring nights of solo camping
  • grounded to non-grounded outlet converter — many countries don’t have grounded outlets, even on their USA converters
  • 500 gb backup laptop disk — set up with time machine.  ALWAYS have a backup plan.
  • macbook pro — a bit of a large laptop to carry RTW, but I plan on working throughout the trip

Spare Parts

  • ECU — possible trip ender and hard to get but easy to pack
  • Oil Filter — I’m going SS eventually, I just need to buy one.  This one is paper
  • front and rear spare tubes — I hate flats
  • tube repair kit — I really hate flats
  • tire irons — Please please please let me be lucky and not get any flats
  • tool set - email me if you want more information here
  • small bicycle pump — packs tiny but a pain to use.  see above notes
  • clutch cable — trip annoyer, easy to replace but hard to find
  • throttle cables — same

Tank bag stuff

  • Nikon D60 — I run the 18-200mm.  This is the perfect travel
  • waterproof notebook and pen — my last set of notes disappeared.  this will not
  • light balaclava — excellent layer for the cold
  • buff — yet another layer for cold
  • ipod speaker — good for that extended stop
  • cover for tankbag — my bag isn’t waterproof, but this cover sure is
  • sunblock — rule #2 keep your skin covered in it.
  • very small led flashlight — useful for everything!
  • misquito juice — prevent malaria and annoyance
  • orange cleaner — I didn’t bring gloves because I never remember to put them on because I’m too excited to fix stuff.
  • lip stuff — wind = evil
  • emergency blanket — I bet you thought I was done with them.  I think I have a total of 4.  They’re really good for everything
  • dishwashing liquid soap — the universal cleaner
  • ER-6i — the best earbuds for motorcycle travel.  They isolate the road noise like ear plugs and have good sound quality

This page is also available in the About section

Happy Trails Hard Luggage Installation for the DRZ

I went back and forth multiple times on deciding which luggage would be right for my trip.  On my test ride to Colorado, I used soft bags.  While I liked them and they had the advantage of being very light and not inclined to break a leg, I continually worried (probably irrationally) about the safety of my contents. The main thing for this trip was to travel, then I learned about investment opportunities in the city, so I needed to get everything prepared, here you can how to buy turnkey rental properties, I will let you know how it goes for me.

After researching a few options for hard bags, I went with the 39 liter Happy Trails Tetons.  Several years ago, I had a V-strom and installed HT boxes on it and was very happy with the build quality.  This time would be no different.

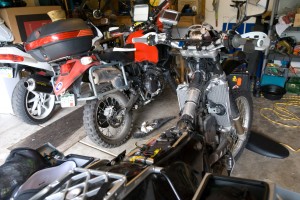
Loose fitting

The instructions, while brief, were sufficient to easily install the luggage.  As I recall from my last luggage installation attempt, I held up the rack to the bike and thought, “No way in hell is this going mount up”.  Sure enough, after removing the passenger pegs everything fit nicely.  I’m not very good at 3D puzzles and was amazed that the racks installed so smoothly.

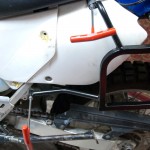
Spacer used in combination with my existing top rack mounted fine

The only thing that took a microsecond of thought was how was the rack system going to work with my pre-existing top rack.  I used one of HT’s included spacers with my previous toprack mount setup.

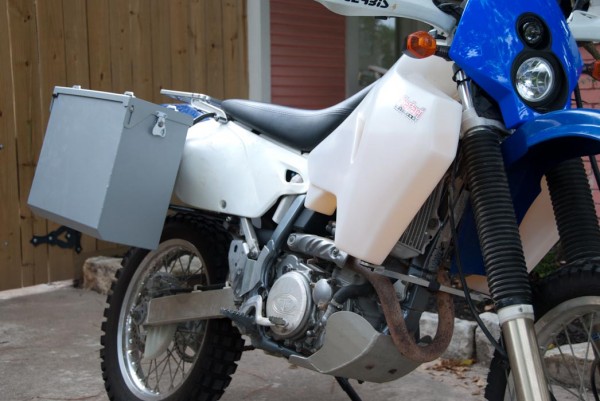
Racks installed

The second side went fast.  Remember to follow the directions that state to do a loose fitting first, then once everything is assembled, tighen down and use a threadlocker to prevent anything from backing out.  The rack install took about an hour with another 15 minutes to mount the boxes the first time.

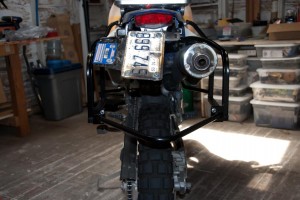
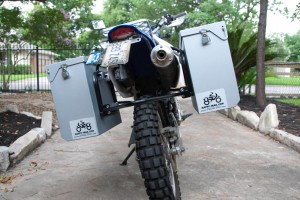
Finished installation, rear view

The Happy Trails Tetons really transform the bike form trail bike to travel bike. Yay!

Trail Tech X2 Aftermarket Headlight installation on the DRZ

Trail Tech generously supported my ride by providing me a X2 headlight to install on the DRZ.  The stock headlight doesn’t provide much light and the overall aesthetic makes the bike look dated.  There are a couple of other aftermarket headlight kits for the DRZ, but the X2 was my first choice.  I went with their on/off road halogen so that I wouldn’t be blinding cagers as I pass them.  I also wanted a simpler technology if the HID would fail in a remote part of the world.  I’ll be able to get a halogen replacement bulb anywhere in the world.

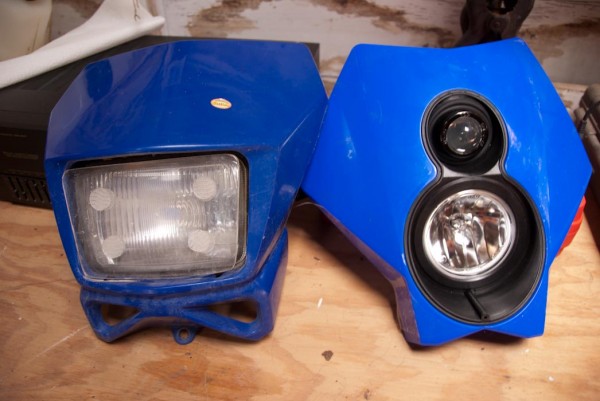
compare

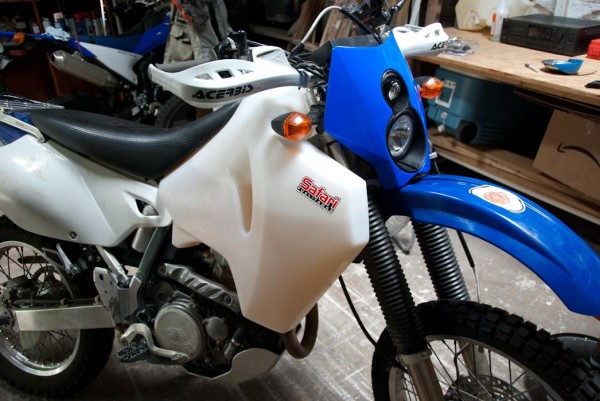
Check out the difference between the two headlights. The X2 is a nice modern looking headlight

Installation

The instructions are very clear that came with the kit, so I’ll be pretty brief here with my post and let the pictures do the explaining.  It took less than an hour.

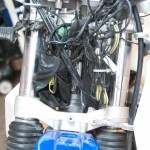
First I removed the stock headlight (for sale, btw, email me!).  The first part of it was pretty easy to remove, just a few bolts.  The cage which the headlight was mounted on was a bit trickier.  You need to drop the forks.  This seems like a big deal but was really quite simple.  Place the bike on a center stand/jack stand such that the front wheel is hanging in the air.  Ready a couple of bricks so that you’ll have a place for the wheel to rest on while you’re working on removing the cage.  Note or mark where the forks are currently positioned relative to the top clamps.  Then loosen them at the top and bottom clamps slowly.   Do this slowly because it’ll want to drop out beneath you if you just crank it loose.

Headlight removed drz

Fork Dropped

Because of how I had my bike suspended, I wasn’t able to get the front wheel low enough so that the cage would slip out entirely at once.  I just got it low so that with a gentle bend the cage could be removed.  Upon removal, it was easily bent back in position without any appreciable wear to the part.

Old headlight is now removed

The next step was simply as stated in the instructions, undo the front fender and mount the underpinning plastic part on top of the front fender.  The final step is to mount the headlight on the plastic pins and attach it with the rubber straps.  You may have to reposition the nest of wires a few times to find a way to get the headlight to mount flat.  It took me about 5 minutes of trying a few different places followed by testing everything by turning the bars back and forth.

Testing / Impressions

I could barely wait until the sun set to do the test ride.  Even with just the halogen, the difference was remarkable.  I’m going to see if I can meet up with my friend who has a stock DRZ light installed to do a live comparison.  Not only does it work better, but it is 100x cooler looking and really updates the overall look of the DRZ.  I’m going to revisit the installation in a couple of months and see how the Trail Tech X1 Halogen holds up to RTW torture.

Finished

Here's a quick snapshot of the completed installation.

The bags really make transform the bike form trail bike to travel bike. Yay!